Body Model Configuration App
One of the first things I did when starting to use the AnyBody Modeling System, was to understand how to configure the human model. This means enabling and disabling different body parts and setting up the available options for muscles, ligaments etc. The model is configured in AnyScript by defining switches which we call Body Model (BM) statements.
#define BM_ARM_RIGHT ONWouldn’t it be nice to configure the model by having some buttons and instantaneous visual feedback as well? That is what I thought! Therefore, I have developed a small plugin which provides a graphical user interface (GUI) for configuring the Body Model (called BM-Plugin). By using it, you will be able to configure your human model in a more friendly manner but without trying to give up the flexibility of AnyScript.
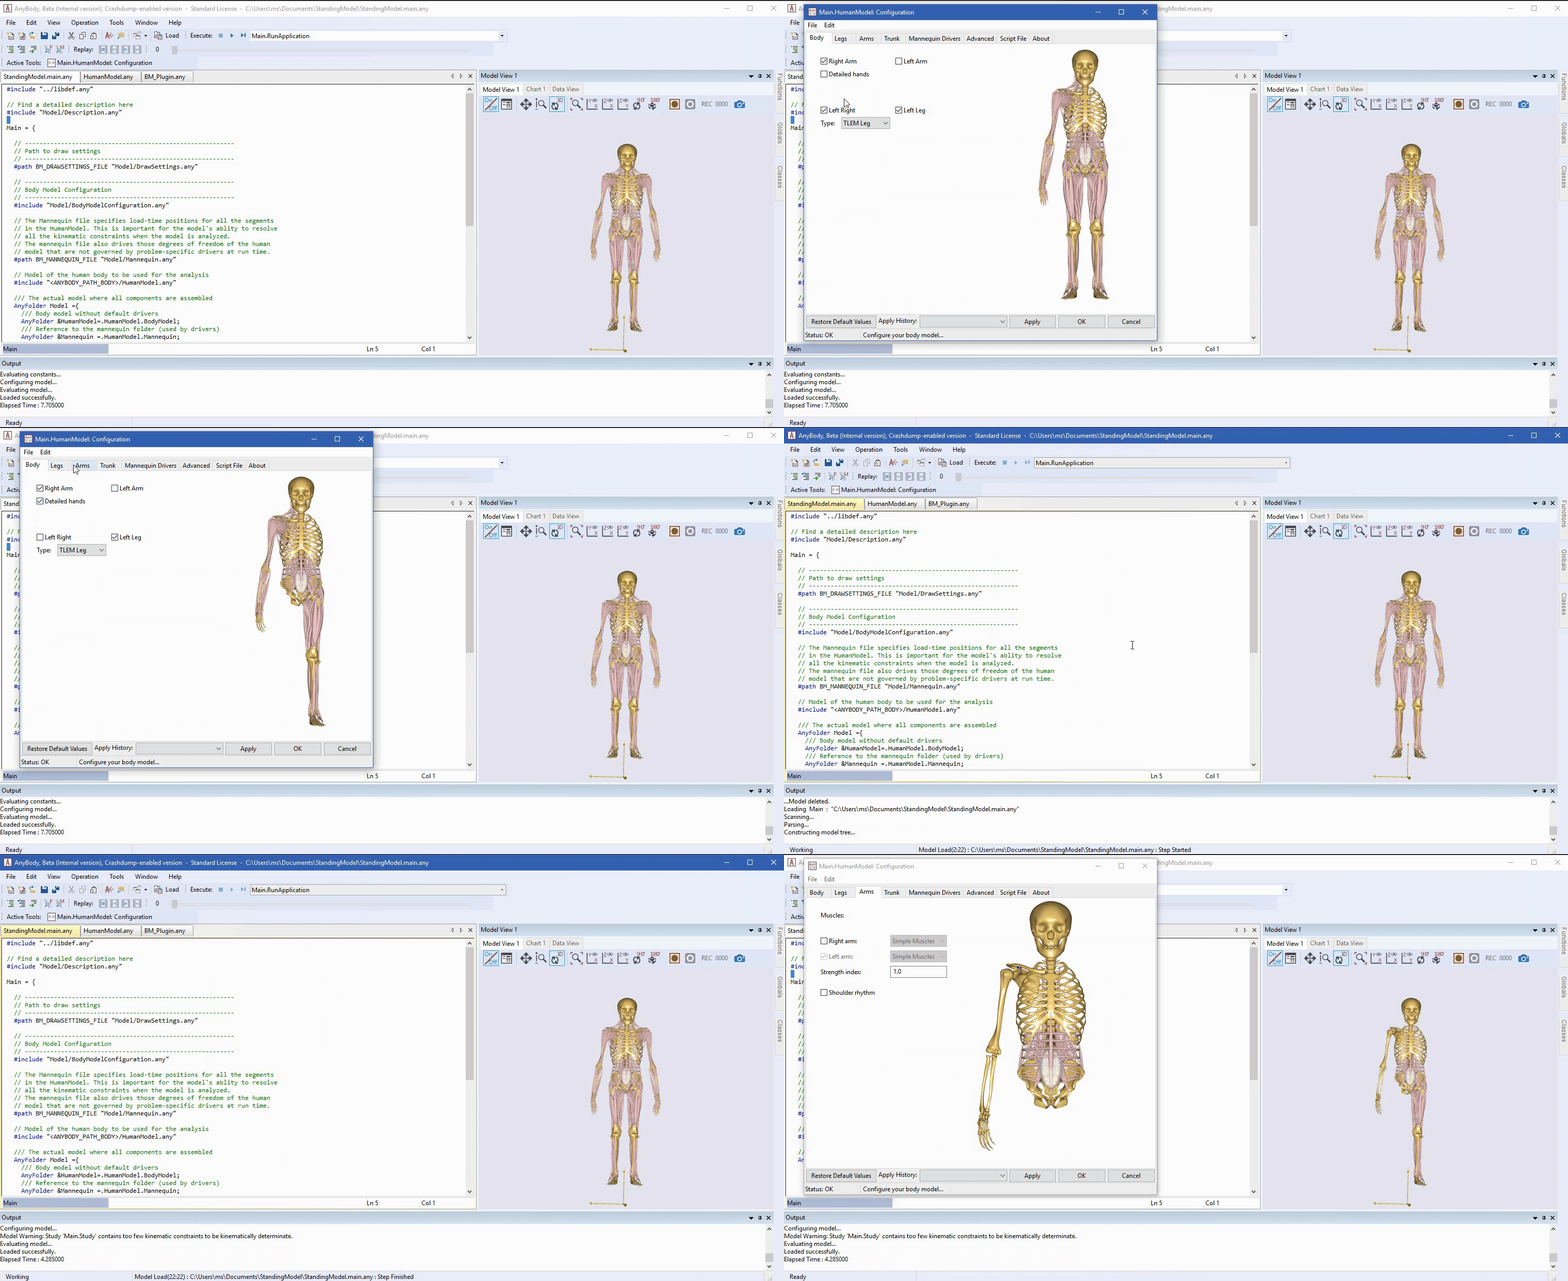
The BM-Plugin targets both beginner and advanced AMS users. If you have little to no experience using AnyScript, the BM-Plugin will help you a lot in getting started with it and to understand how switches and BM statements work. If you are an advanced AMS user, you will find configuring your human model much easier and much faster by using the plugin. And don’t worry about losing your freedom with AnyScript! BM Plugin is not meant to replace it, it is meant to write it for you, so it saves you time.
In the remainder of this post I will show you what the plugin is able to do and some technicalities.
How to get and use BM-Plugin
BM-Plugin comes integrated with AMMR v2.2 and it is available to use in AMS starting with version v7.2. All you have to do is to make sure that you have these versions or later available on your computer. You can find more information about how to get the latest AMMR here. Once you have everything ready you can load any model containing the the AnyBody human model, i.e. that is any model that has the following:
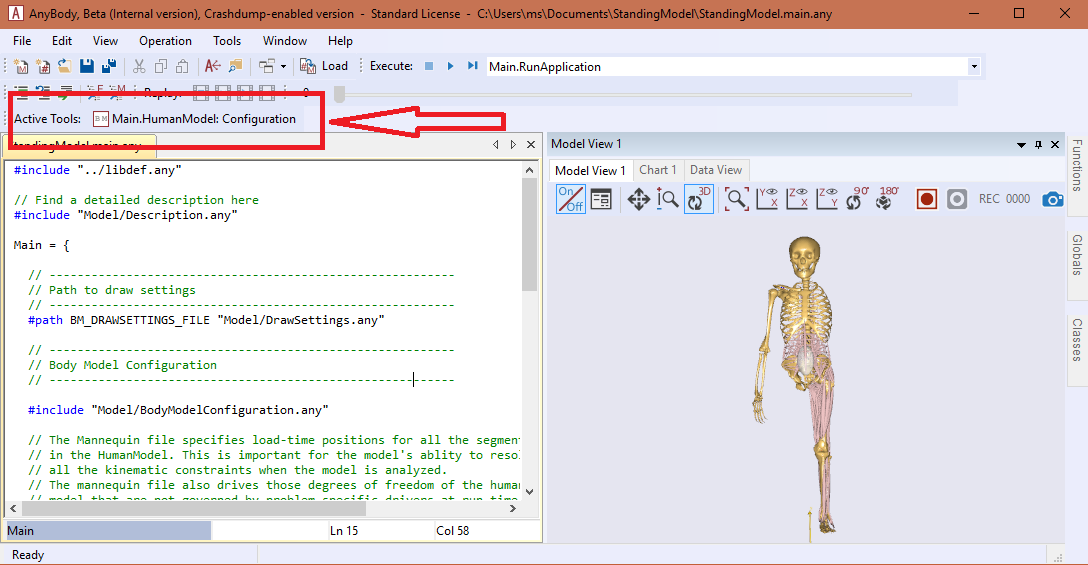
#include "<ANYBODY_PATH_BODY>/HumanModel.any"If everything is fine, you should be able to start the BM-Plugin by clicking the button marked in the figure below:
Using BM-Plugin
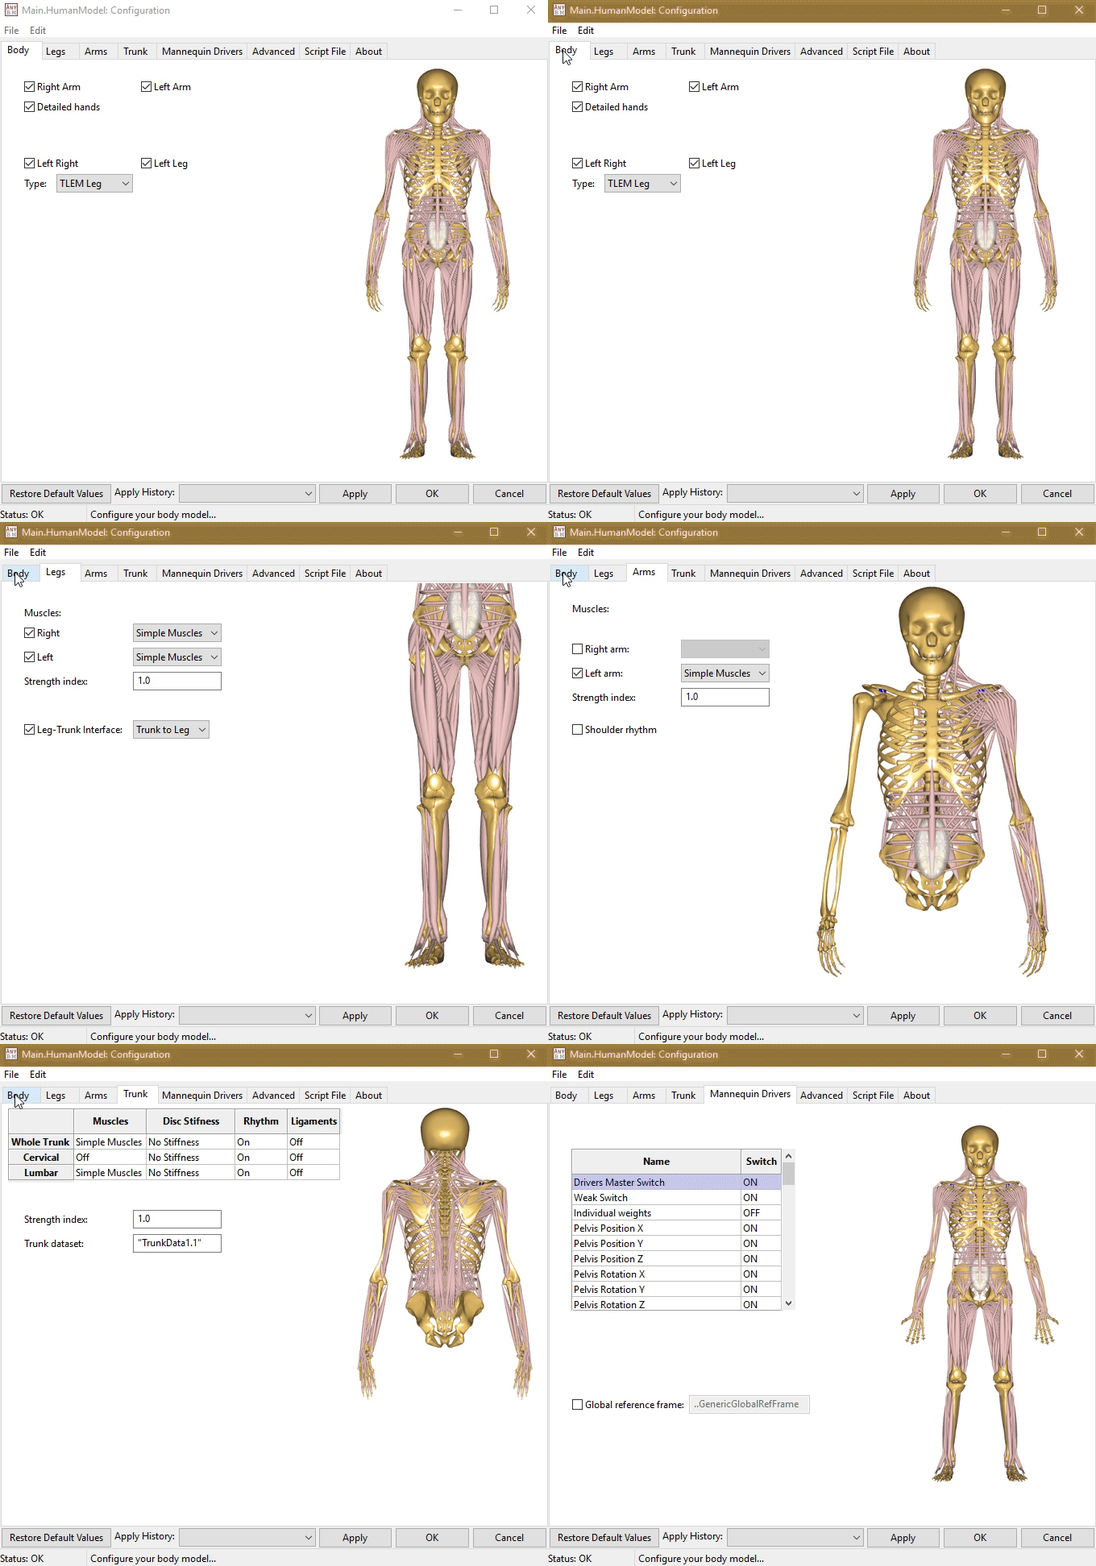
The BM-Plugin is structured in a number of tabs, each giving you options to adjust the configuration of different body parts while providing visual feedback if available.
These tabs are: Body, Legs, Arms, Trunk and Mannequin Drivers. Once
the desired configuration is set, you can load it in AMS by clicking Apply or
OK. The difference is that by clicking Apply the Plugin will stay open for
you to configure the model further. When OK is clicked, the configuration is
saved in a history file which is available in the Apply History drop menu,
next to the Apply button. It is therefore possible to load a previous
configurations of the model.
Of course, not all BM statements have a visual representation in the AMS Model
View or are directly related to physical body parts. Therefore, the BM
statements which were not classified in the tabs mentioned before can be found
and modified in the Advanced tab.
By having the presented overview of the Plugin, you should be ready to use it now. However, if you are interested in finding some details about how it works behind the scenes, continue reading.
How BM-Plugin works (tl;dr)
As stated in the introduction, the BM-Plugin is dependent on the HumanModel.
Therefore, every time you start the plugin, it will check your .main.any file
to determine if it is included. If it is, the Plugin will create a new file
named BodyModelConfiguration.any inside the Model folder next to your
.main.any file.
Note! All the example models in the AMMR already come with an BodyModelConfiguration.any file pre-included.
The plugin will then ask you if you allow it to include this file inside the main file (I recommend that you do):
#include "Model/BodyModelConfiguration.any"The plugin will store and modify all the needed BM statements for your model inside the BodyModelConfiguration.any file. I encourage you to use this file to store the BM statements regardless if you use the plugin frequently or not. You will also find that most of the examples using the HumanModel have this structure implemented and they are ready to be configured using the BM-Plugin.
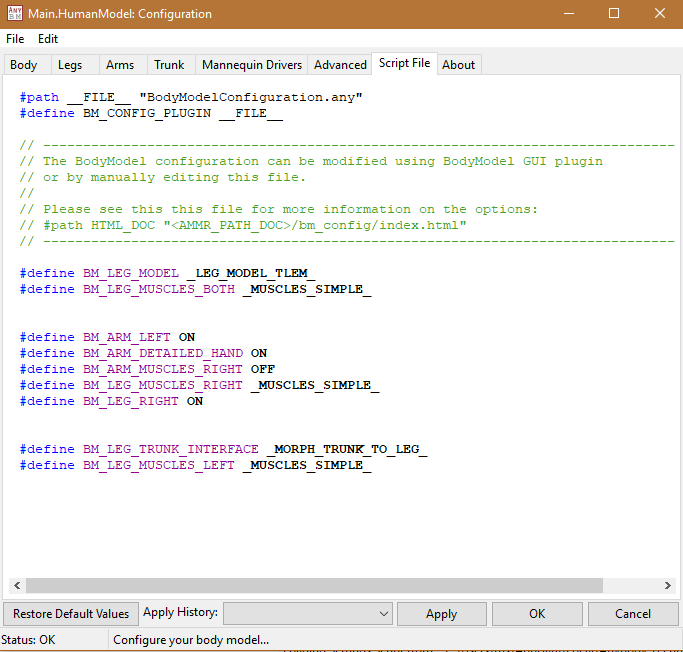
The Configuration file can be seen inside the plugin under the Script File tab:
Now I think you know enough about the plugin to try it yourself, so what are you waiting for?
Any development suggestions and feedback are more than welcomed!



Leave a comment