
Lesson 3: Scaling using segmental scaling vectors#
This tutorial presumes that you have completed Scaling tutorial Lesson 1: Joint to joint scaling methods and Scaling tutorial Lesson 2: Scaling based on External Body Measurements. It covered all the methods based on distance measurements and estimations.
This lesson introduces the last scaling method, which differs from the previous ones by the input parameterse and, therefore, allows another set of solutions when it comes to anthropometric scaling
Scaling XYZ#
The scaling laws discussed in the previous measurements rely on standard
measurements and distance estimates such as joint-to-joint distances or
predefined external measurements, e.g. manual palpations and so on. This is a
good approach, when a corresponding measurement study can be designed in
advance, or a particular measurement protocol can be adjusted to fit the model
requirements. However, sometimes this is not feasible and the modeller needs to
rely on available data, such as an anthopometric database, or data coming from
an old study with measurements different to the standard ones. In this case
individual segmental scaling can be constructed by establishing a correspondence
between available data and virtual measurements on the model. Let us consider
the following example: For _SCALING_UNIFORM_ the head is scaled by a single
factor (HeadHeight), and in case of the _SCALING_LENGTHMASSFAT_ it would
also depend on the corresponding mass of the head segment. But we could actually
know even more accurate dimensions of our subject’s head. And these measurements
should be used by the model. Let’s say that our subject corresponds to the 50th
percentile male and the measurements will be taken from DIN 1986 (Deutsches
Institut fur Normung) anthropometric dataset.
HEAD HEIGHT, mm |
HEAD LENGTH, mm |
HEAD BREADTH, mm |
|---|---|---|
228 |
193 |
156 |
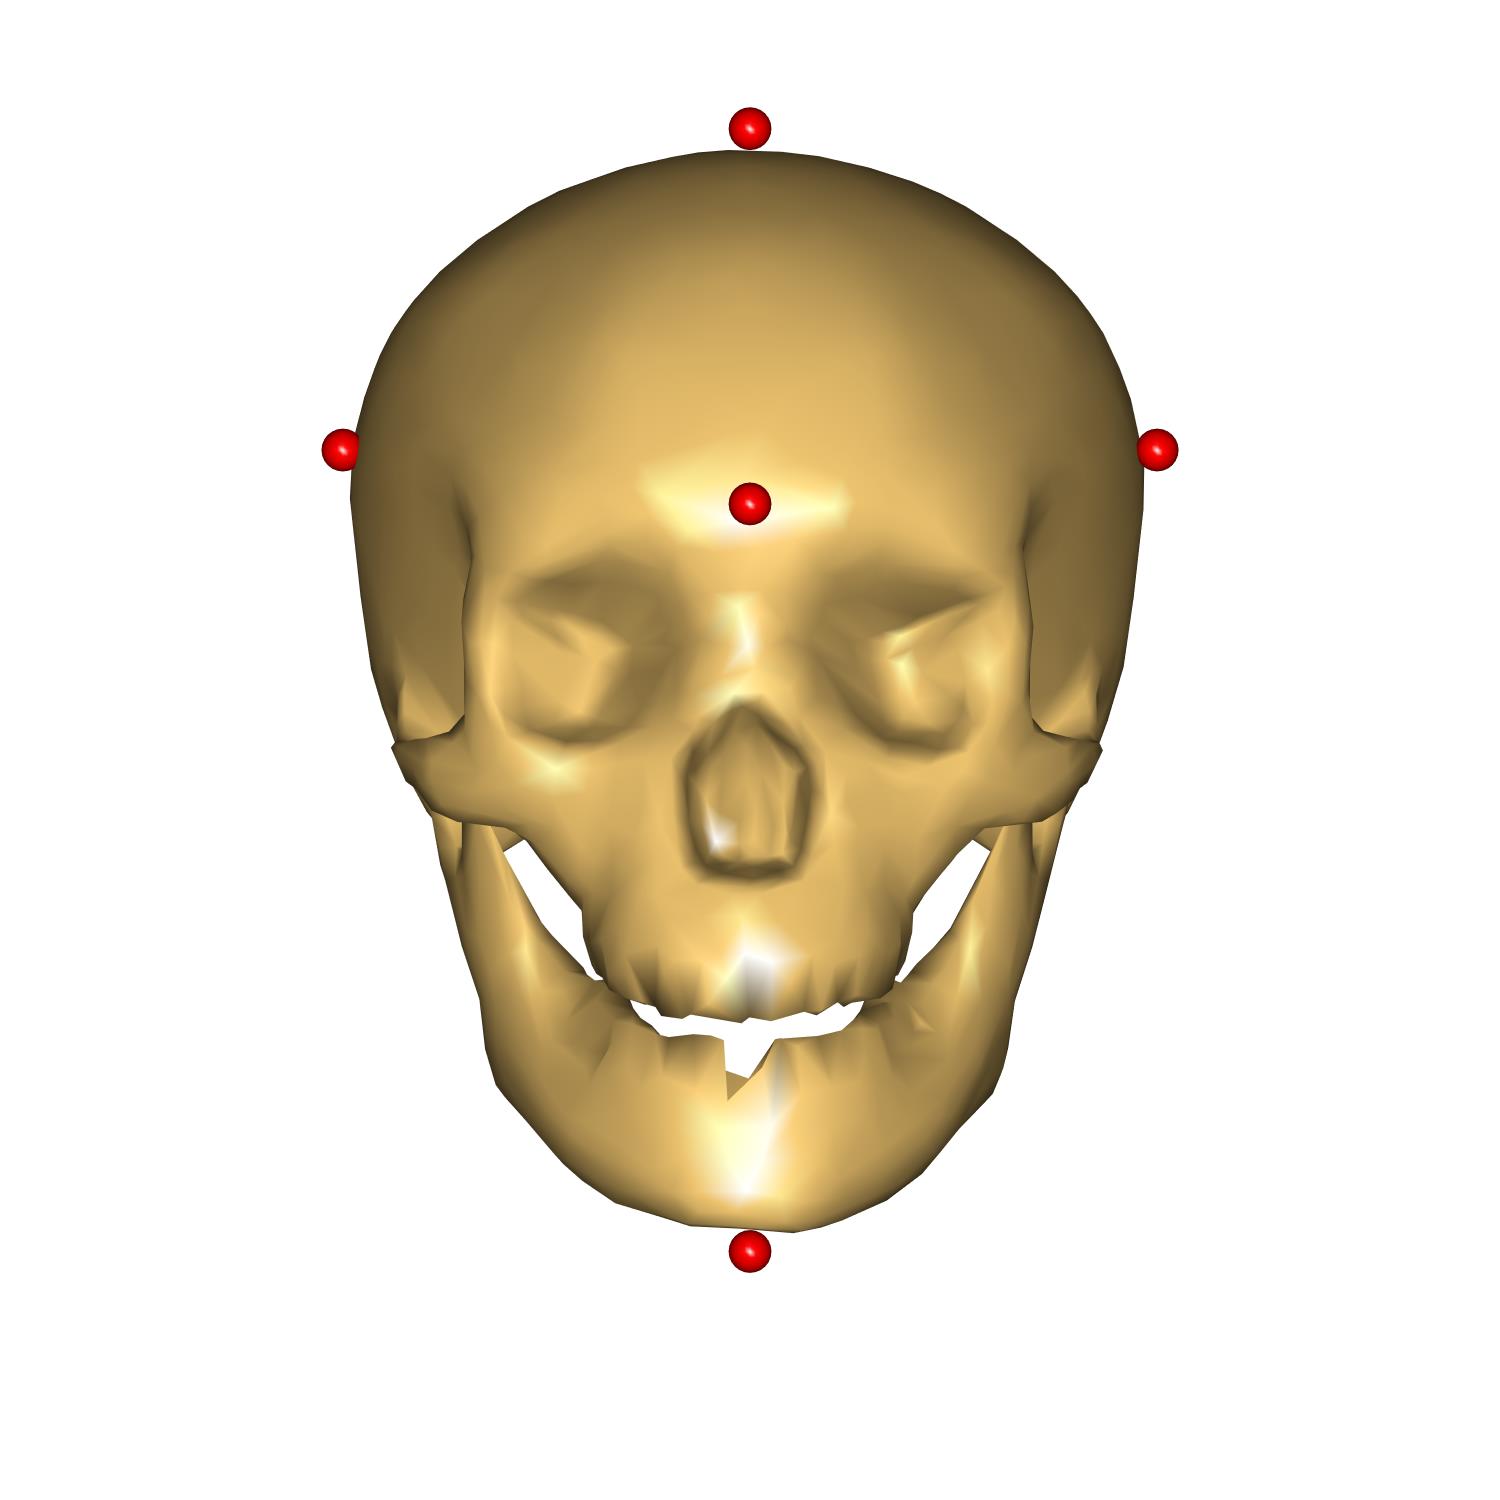
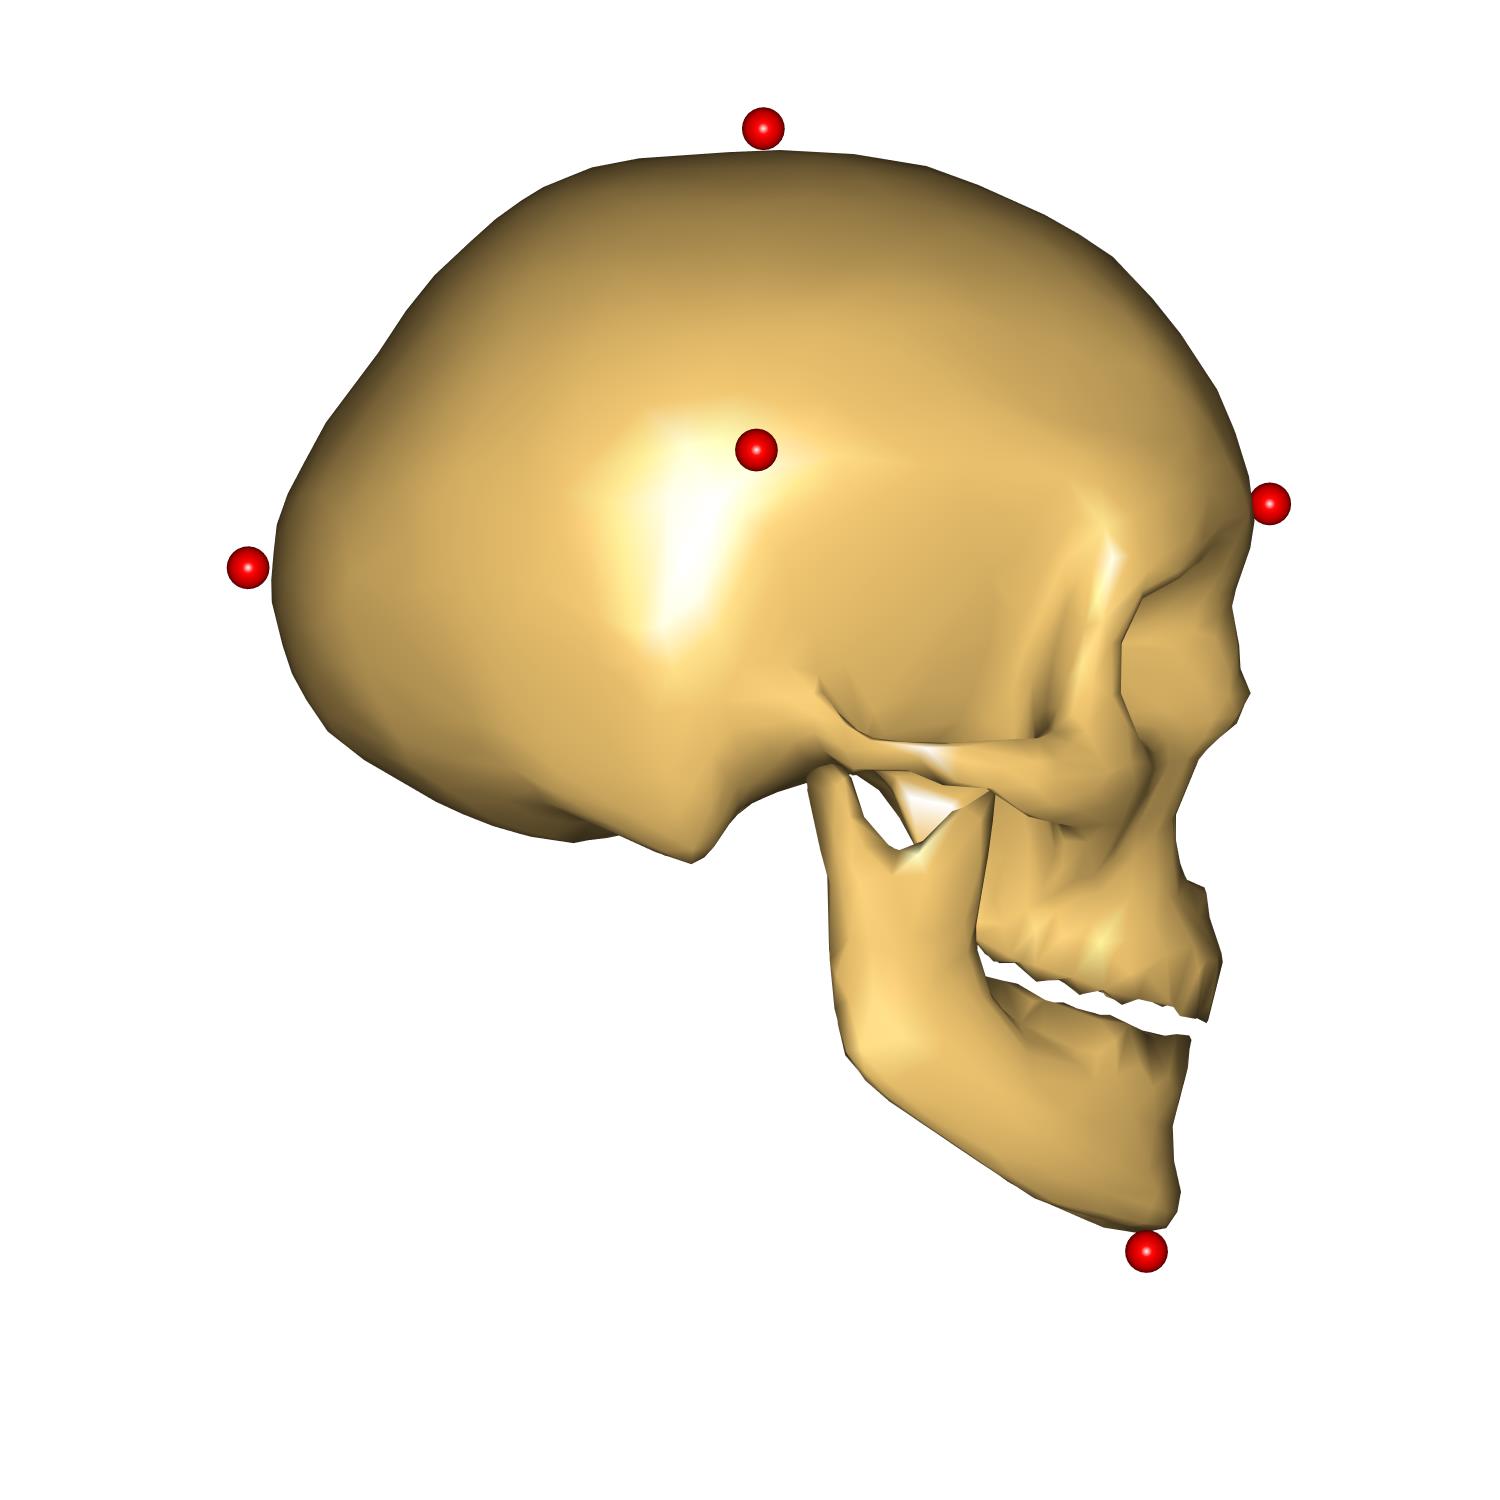
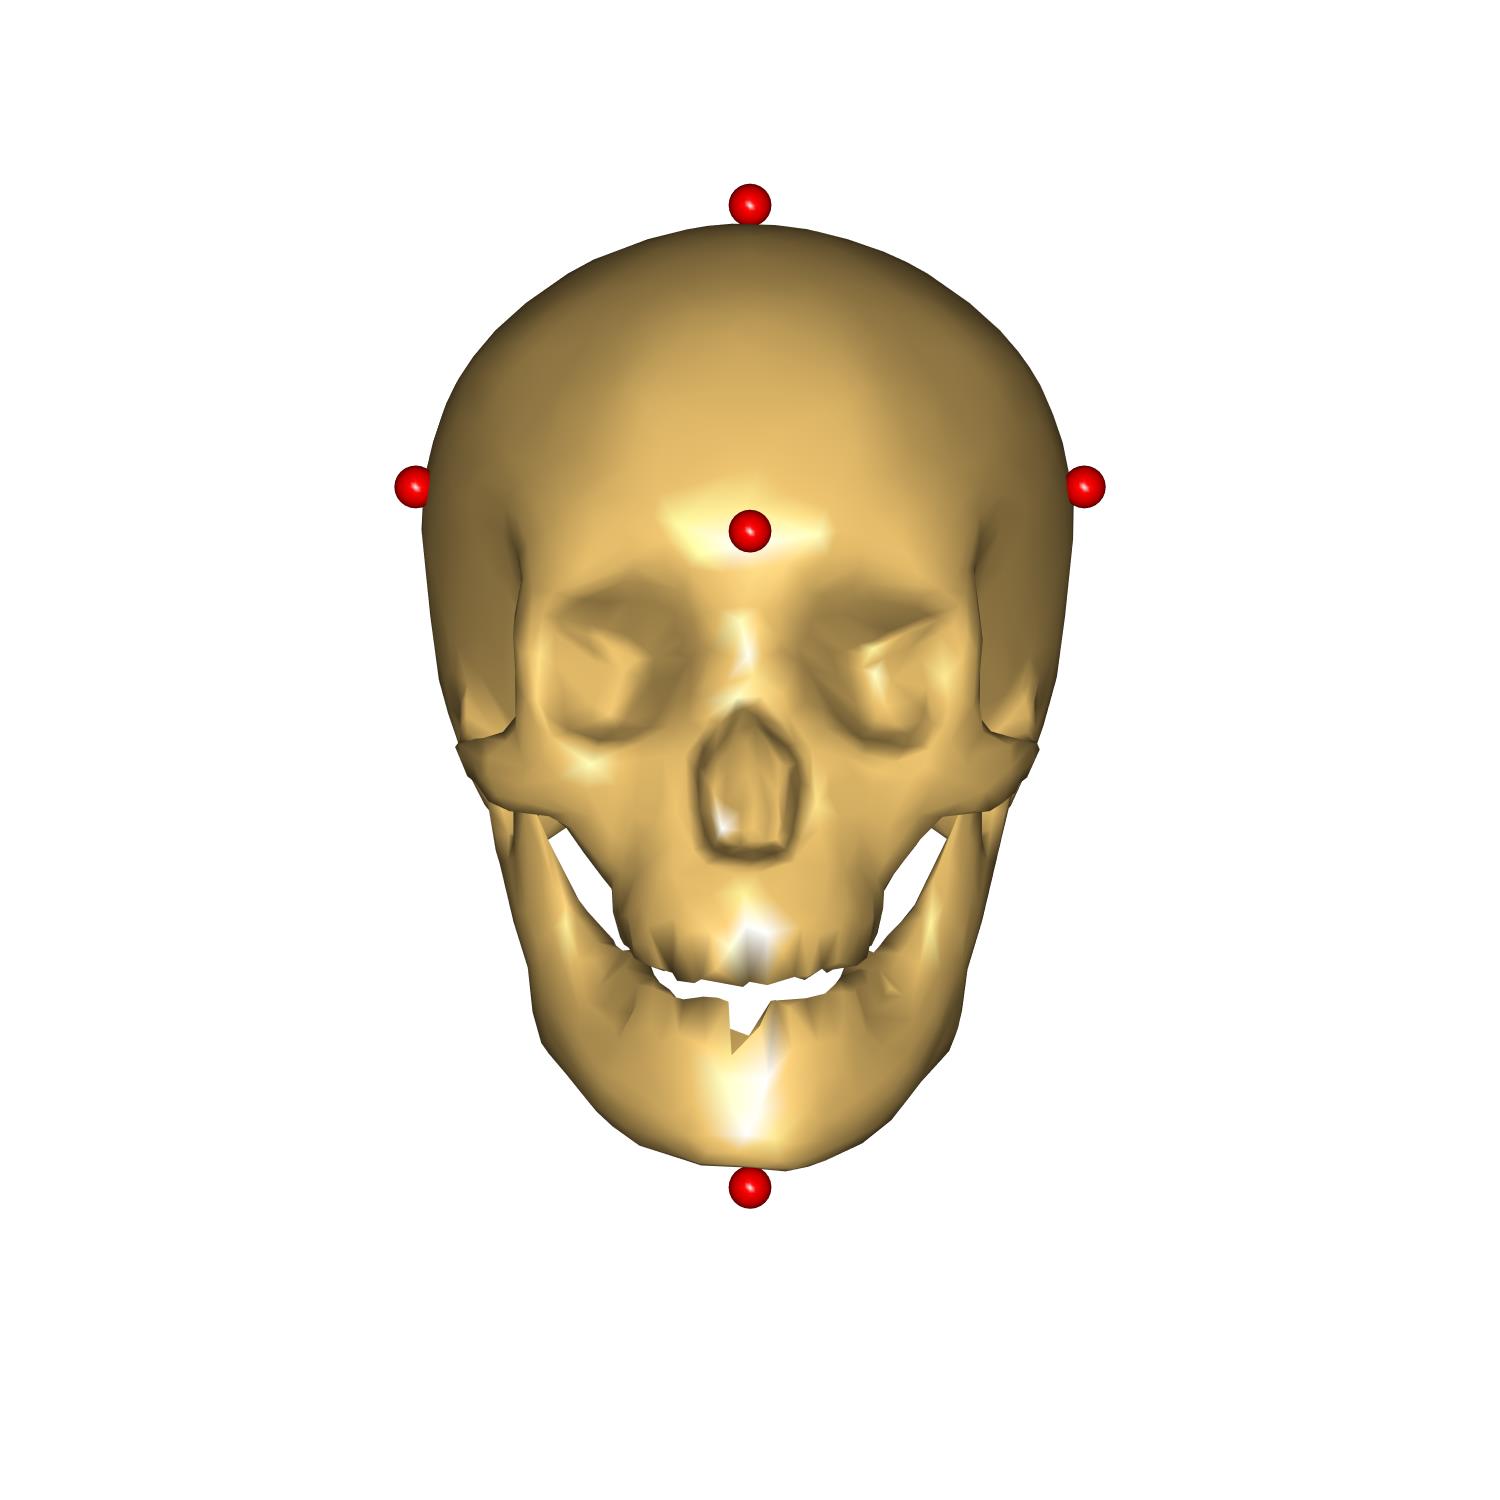
The head height represent the vertical size of the head, measured from the chin to the top of the head, head length represents the depth of the skull from the most anterior point on the forehead to the most posterior point on the back of the head, and, finally, head breadth correspond to the width of the head.
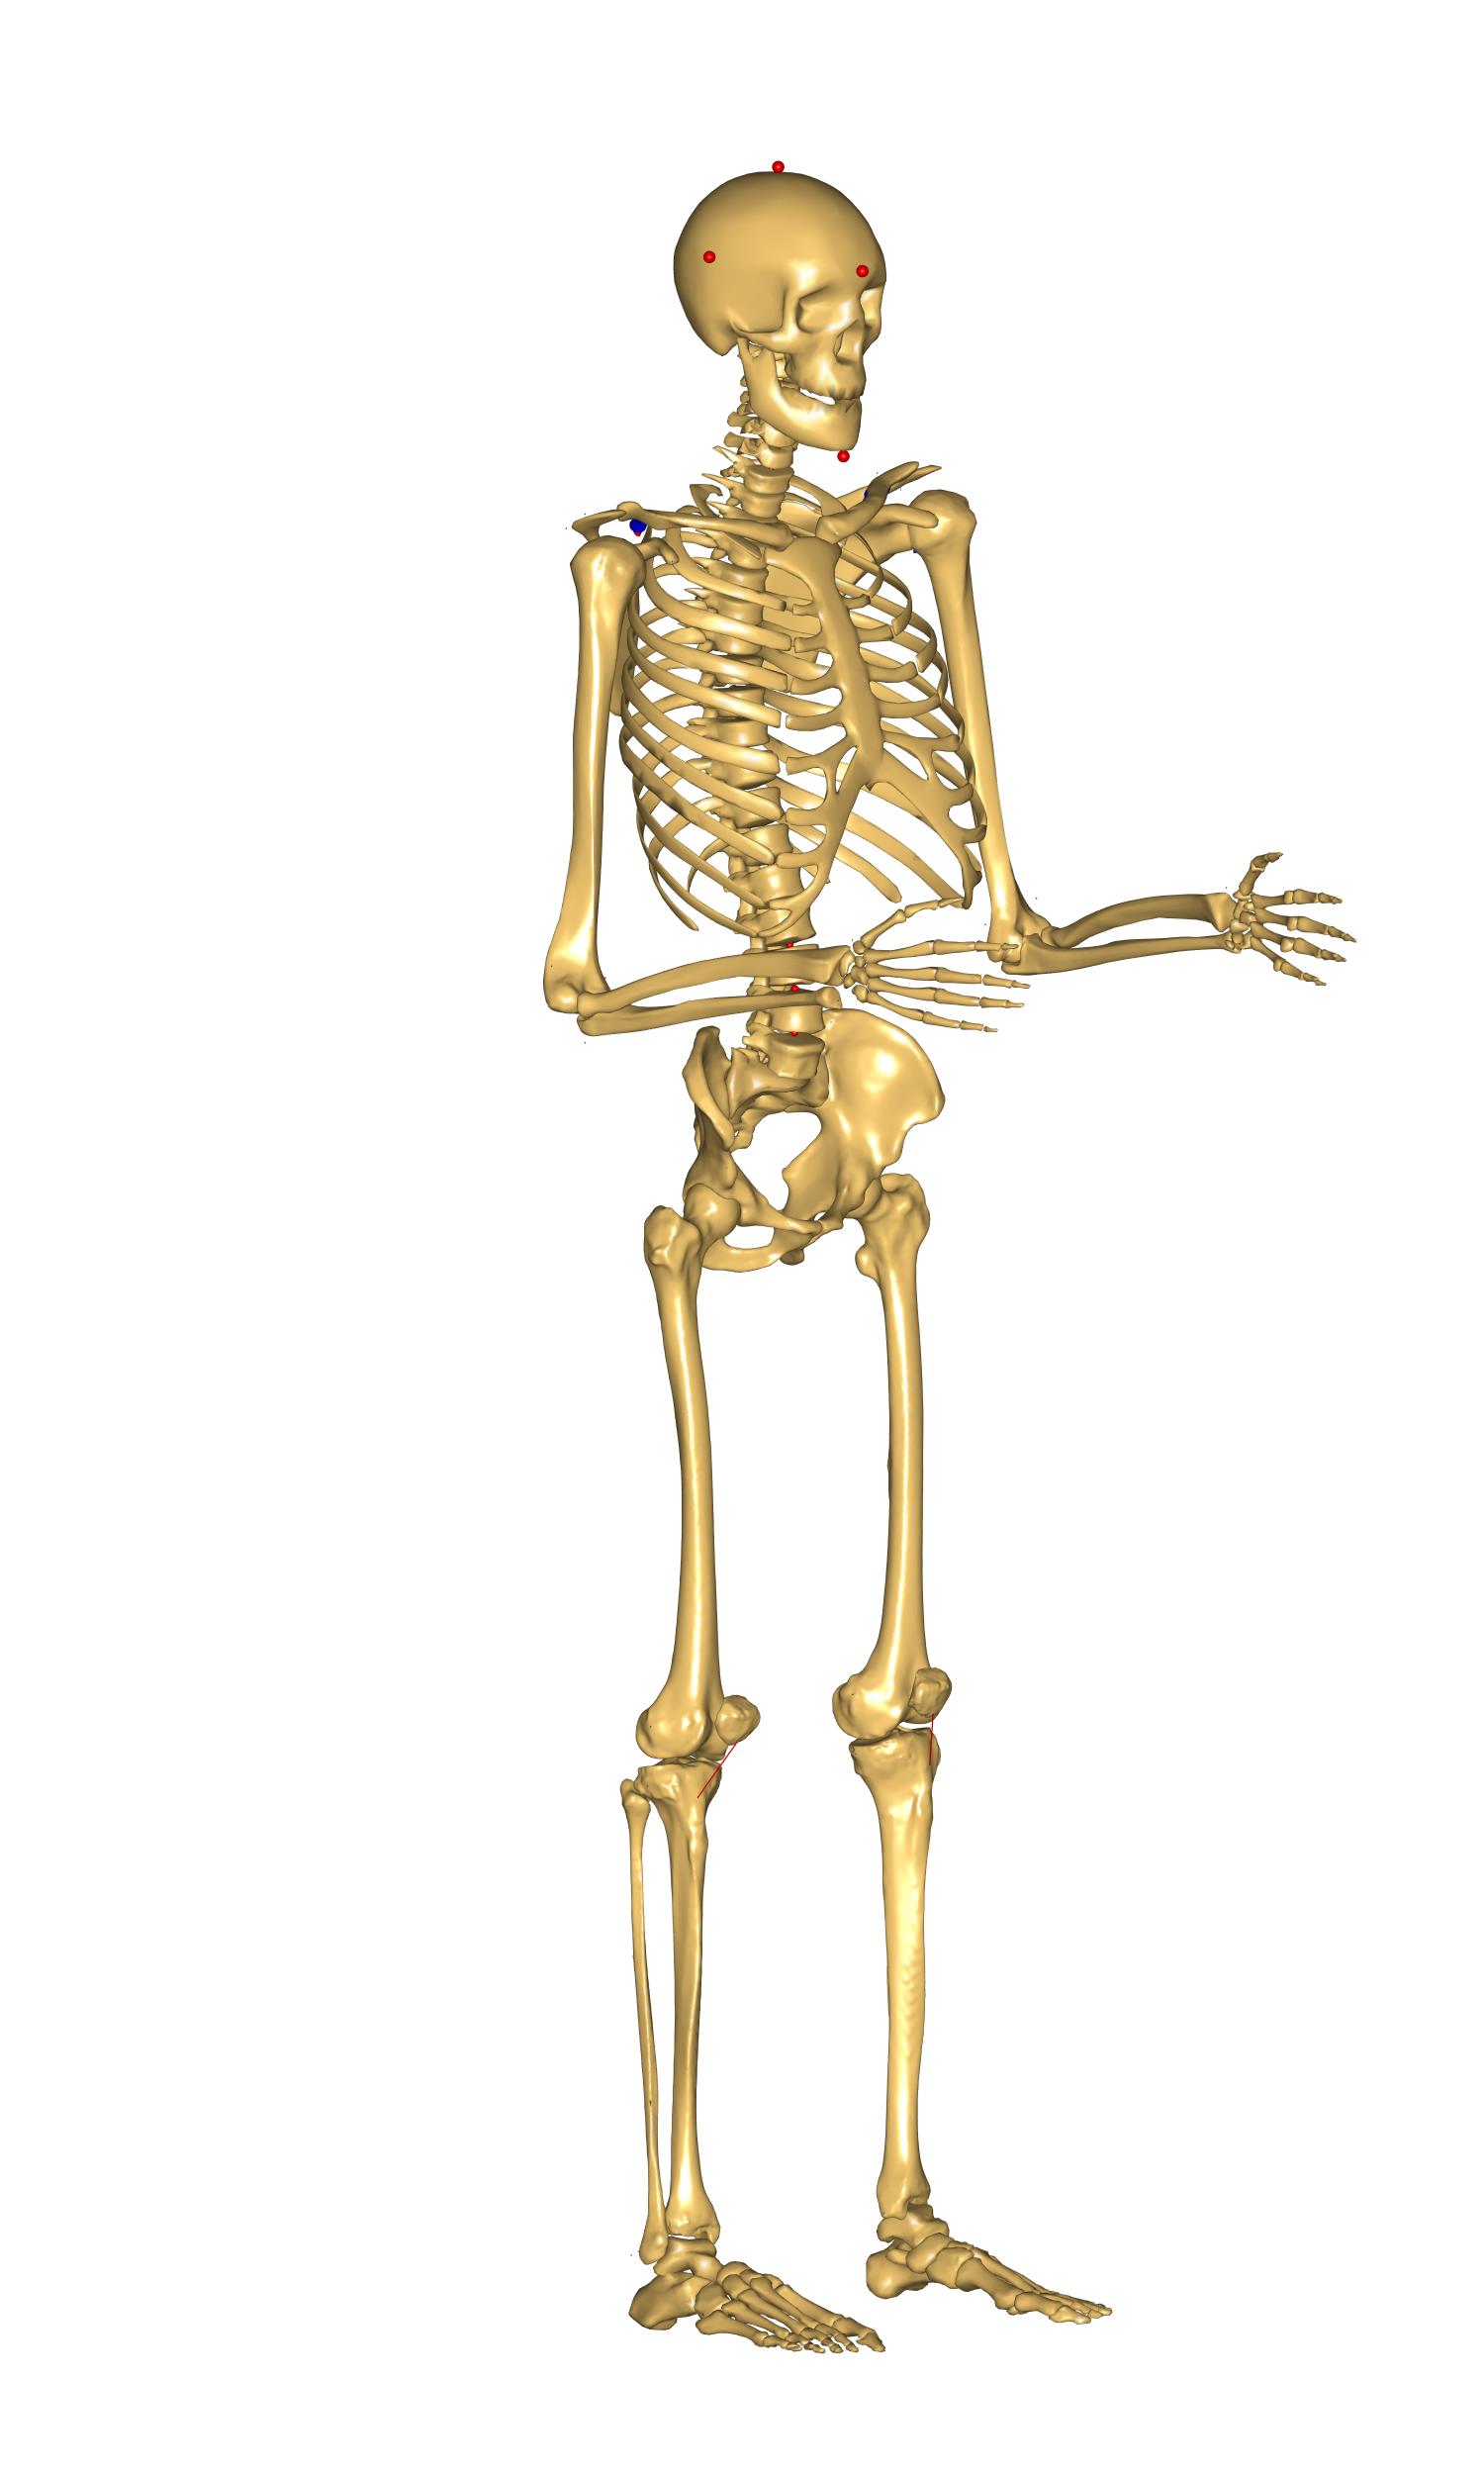
We have prepared some code to visualize points used to measure these distances. As well as that a couple of measures were added to see the result of scaling. Please enable this code by uncommenting the following code:
// Head scaling visualization and measurements
#define HEAD_SCALING_XYZ
#ifdef HEAD_SCALING_XYZ
  #include "Model\HeadScalingXYZ.any"
#endif
Let us use the last scaling law: _SCALING_XYZ_. For this purpose please
switch it on like shown below:
// Scaling laws using joint to joint measures
//  #define BM_SCALING _SCALING_UNIFORM_
//  #define BM_SCALING _SCALING_LENGTHMASS_
//  #define BM_SCALING _SCALING_LENGTHMASSFAT_
   #define BM_SCALING _SCALING_XYZ_
Let us inspect what segment dimension are available for this scaling law. Go to
Main.HumanModel.Anthropometrics.SegmentDimensions in the model tree:
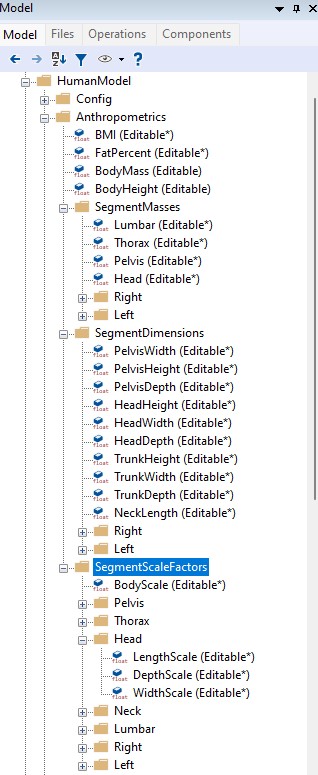
We could see that the first section containing overall body parameters and the
SegmentMasses folder are identical to any other scaling law. But instead of only
having a folder called SegmentDimensions, we now have another called
SegmentScaleFactors. Looking at the content it is clear that this folder
contains invidual scaling factors along main axes. By default all values are set
to be 1, meaning that the cadaveric data will not scale and the law will behave
similarly to the _SCALING_NONE_.
Let us define the head scaling factors as expected lengths divided by unscaled head dimensions. In HeadScalingXYZ.any we have already prepared the computation of these distances and we just need to check these values in the Model Tree:
Tip
Right-click on the object and use “Locate in Model Tree” to find it in the Model Tree.
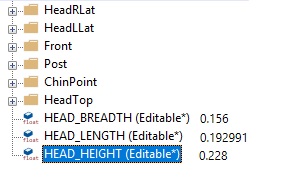
Now that we know original and desired dimensions the scale factors can be defined as
the following block of code inside the AnyManXYZ.any. Please apply this changes and
reload the model:
Main.HumanModel.Anthropometrics.SegmentScaleFactors.Head = {
  // Standard unscaled values
  AnyVar HEAD_BREADTH = 0.19;
  AnyVar HEAD_LENGTH  = 0.239;
  AnyVar HEAD_HEIGHT  = 0.26;

  // Scale factor computation
  LengthScale = 0.228/HEAD_HEIGHT;///< 228mm, DIN 1986
  DepthScale = 0.193/HEAD_LENGTH; ///< 193mm, DIN 1986
  WidthScale = 0.156/HEAD_BREADTH;///< 156mm, DIN 1986
};
We have succesfully personalized our model to have a head that corresponds to
the German 50th percentile man. We can see that it is slightly smaller than
the default one coming with model. However, we still see that the body does not
match the head size. The same anthropometric dataset suggests that the height
of the 50th percentile man should be 173.3mm. We could mimic _SCALING_UNIFORM_
by defining a common scaling factor and applying it to all dimensions like this:
Main.HumanModel.Anthropometrics.BodyMass = 75 ;
Main.HumanModel.Anthropometrics.BodyHeight = 180 /100;

#define STATURE_SCALE_FACTOR 1.733/1.75

...

Main.HumanModel.Anthropometrics.SegmentScaleFactors.Pelvis = {
  LengthScale = STATURE_SCALE_FACTOR;
  DepthScale = STATURE_SCALE_FACTOR;
  WidthScale = STATURE_SCALE_FACTOR;
};
Main.HumanModel.Anthropometrics.SegmentScaleFactors.Thorax = {
  LengthScale = STATURE_SCALE_FACTOR;
  DepthScale = STATURE_SCALE_FACTOR;
  WidthScale = STATURE_SCALE_FACTOR;
};

...
By applying these changes we complete this tutorial. Our model looks more natural and corresponds to the 50th percentile German male as suggested by DIN in 1986.
If you want to learn about more advanced patient specific scaling, take a look at the AnyBody tutorials. The tutorial on Scaling covers how to do patient-specific scaling based on geometry data from MRI and CT scans.